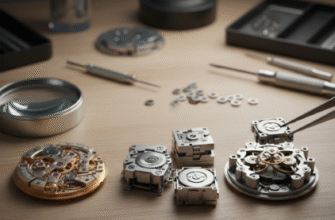
Creating a metallic logo or marker that stands out isn’t just about a great design; it’s about the manufacturing process that brings it to life. Electroplating is a premier technique used to produce high-end, durable, and visually striking applied logos—the kind you see on luxury goods, electronics, and high-performance vehicles. This process involves depositing a thin layer of metal onto a conductive surface, allowing for intricate designs with a premium finish that printing or stickers simply cannot replicate. It’s a journey from a digital file to a tangible, gleaming emblem.
The entire process is a blend of precision chemistry and meticulous craftsmanship. Unlike a simple casting or stamping, electroplating builds the logo layer by layer at a molecular level, ensuring unparalleled detail and a finish that can range from mirror-bright chrome to satin gold. Let’s walk through the detailed steps involved in transforming a raw piece of metal into a finished, electroplated marker ready for application.
The Blueprint: Design and Substrate Preparation
Everything begins with a solid foundation, which in this case, is both the digital design and the physical base material, known as the substrate. The quality of these initial stages dictates the success of the final product.
Design Considerations
Before any metal is cut, the logo must exist as a clean vector file (like an .AI or .EPS). This isn’t just about aesthetics; the design must be optimized for the electroplating process. Extremely sharp internal corners can be problematic as electrical current tends to concentrate on outer edges, potentially leading to uneven plating thickness. Similarly, very fine, isolated details might not plate robustly. A good designer will account for these physical limitations, perhaps by slightly rounding corners or thickening delicate lines to ensure the final product is both beautiful and durable.
Selecting and Preparing the Substrate
The substrate is the core of the logo. Common materials include brass, copper, nickel silver, or stainless steel. The choice depends on factors like cost, desired final weight, and compatibility with the plating process. Brass is a popular choice for its excellent conductivity and smooth finish.
Once the material is chosen, the raw logo shapes, or ‘blanks’, are created. This is typically done through chemical etching, CNC machining, or precision stamping. After the blanks are cut, they undergo a crucial preparation phase:
- Deburring and Polishing: The edges are smoothed to remove any burrs from the cutting process. The surface of the blank is then polished to the desired level of reflectivity. If you want a mirror-finish final logo, you need a mirror-finish substrate before it ever enters a plating tank. Any scratch or imperfection on the base will be magnified by the subsequent shiny plated layers.
- Cleaning and Degreasing: This is arguably the most critical step. The blanks must be absolutely, surgically clean. Any trace of oil, grease, polishing compound, or even a fingerprint will prevent the plated layers from adhering properly, leading to peeling or blistering. The cleaning process is multi-stage, often involving an ultrasonic bath with a degreasing solution, followed by an electro-cleaning step where the part is charged in an alkaline solution to actively strip away any remaining contaminants.
Proper substrate preparation is non-negotiable. Over 90% of electroplating failures, such as poor adhesion or rough finishes, can be traced back to inadequate cleaning. Rushing this stage will compromise the entire project, wasting time and materials. Always double-check cleaning procedures and handle parts with gloves after they have been degreased.
Creating the Stencil: Masking for Precision
Electroplating deposits metal over the entire submerged surface of a conductive object. To create a specific design, you must protect the areas you don’t want to be plated. This is done through a process called masking or ‘stopping off’. The precision of the mask directly translates to the sharpness of the final logo.
Photoresist Masking
For highly detailed and intricate logos, the gold standard is photoresist masking. This technique is borrowed from the circuit board industry and offers incredible precision. The process involves several steps:
- Application: A thin, uniform layer of a light-sensitive liquid or film called photoresist is applied to the clean substrate surface.
- Exposure: A ‘phototool’—essentially a transparent film with the logo design printed on it in opaque black—is placed over the resist-coated substrate. The entire assembly is then exposed to high-intensity UV light.
- Developing: Where the UV light passed through the clear parts of the phototool, the resist is hardened or ‘cured’. The substrate is then submerged in a developing solution that washes away only the unhardened resist (the areas that were shielded by the black parts of the design), exposing the raw metal underneath in the precise shape of the logo.
The result is a perfect stencil of the logo directly on the metal surface, ready for the plating bath.
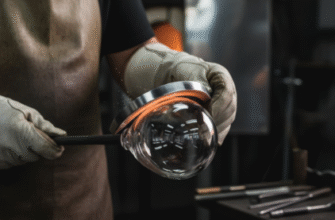
The Main Event: The Electroplating Process
With the substrate prepared and masked, it’s time for the actual plating. This happens inside an electroplating tank, which contains a specialized chemical solution called an electrolyte. This solution contains dissolved ions of the metal you want to plate, for example, nickel ions (Ni2+) for nickel plating.
The Plating Cell
A basic plating setup consists of four key components:
- The Anode: A positive electrode, often made of the same metal being plated (e.g., a pure nickel bar).
- The Cathode: A negative electrode, which is the part being plated (our logo blank).
- The Electrolyte: The chemical bath that allows electricity to flow and provides the metal ions for deposition.
- The Power Supply: A rectifier that supplies a controlled, low-voltage direct current (DC) to the system.
When the power is turned on, a circuit is completed. At the anode, the metal slowly dissolves into the solution, replenishing the metal ions. At the cathode, the metal ions from the solution are attracted to the negatively charged surface. They gain electrons and are converted back into solid metal atoms, which deposit onto the exposed surfaces of the logo, forming a smooth, coherent layer.
Multi-Layer Plating for Quality
A professional, high-quality logo is rarely just a single layer of metal. A multi-layer approach is used to ensure durability, corrosion resistance, and a superior final appearance. A typical sequence for a chrome-finish logo might be:
- Copper Strike: An initial, very thin layer of copper is often applied first. This ‘strike’ layer acts as a primer, promoting excellent adhesion between the substrate (e.g., brass) and the subsequent layers.
- Bright Nickel: Next, a thicker layer of bright nickel is plated. This layer provides the bulk of the corrosion resistance and is responsible for the bright, reflective character of the final piece. The nickel levels out minor surface imperfections, creating a glass-like surface.
- Final Finish Layer: The final, visible layer is then applied over the nickel. This could be chromium for that classic silver mirror look, gold for a luxury finish, or black nickel for a modern, sleek appearance. This top layer is typically very thin, as its purpose is primarily decorative.
The thickness of each plated layer is precisely controlled by two main factors: the amount of current applied (current density) and the amount of time the part is left in the plating bath. Industrial platers use advanced calculations and equipment to ensure these layers are within tight tolerances, often measured in microns. This control is essential for consistency and meeting performance specifications.
The Final Stretch: Finishing and Inspection
Once the logo has passed through all its plating baths, the job is not yet done. The final steps are what turn a plated part into a finished product.
Post-Plating Steps
The first step after removal from the final tank is a series of rinses in clean water to remove any residual electrolyte chemicals, which could cause spotting or corrosion later on. The masking material is then stripped away, revealing the sharp contrast between the plated logo and the unplated background. The parts are then dried thoroughly, often in a centrifuge or with clean, compressed air.
Depending on the desired final look, additional steps might be taken. For example, a clear protective coating, such as an electrophoretic lacquer, can be applied to protect the finish from tarnishing or scratches, especially for metals like silver or copper. Sometimes, the background area that was masked might be filled with colored enamel to add another dimension to the design.
Quality Control
Every finished piece undergoes a strict quality control inspection. This involves a visual check for any defects like pits, burns, or cloudiness in the finish. Adhesion is tested to ensure the plated layers are securely bonded to the substrate. For high-specification jobs, the thickness of the plating may be measured using non-destructive methods like X-ray fluorescence (XRF). Only after passing this final inspection is the logo ready to be fitted with an adhesive backing and sent out to be applied to the final product, serving as a permanent mark of quality and identity.