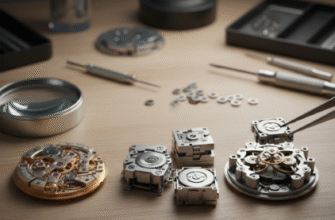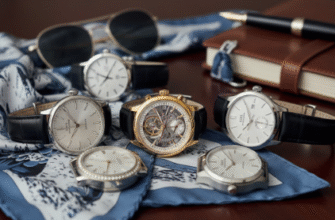
In the world of high-end watchmaking, where precision engineering often takes the spotlight, there exists an art form that is centuries old, incredibly demanding, and breathtakingly beautiful. We’re talking about the traditional grand feu enamel dial. It’s not just a component; it’s a miniature work of art, a testament to human skill and patience. Unlike a standard painted or lacquered dial, a grand feu enamel surface has a unique, luminous depth and a permanence that defies aging, its colors remaining as vibrant centuries later as the day they were fired. The journey to create one is a perilous dance with fire, where a single misstep can destroy days of meticulous work.
The Foundation: Stamping the Copper Blank
Every masterpiece begins with a canvas. For a grand feu dial, this canvas is a thin disc, or blank, typically stamped from a sheet of copper. Copper is the traditional choice due to its excellent malleability and its ability to form a strong bond with the enamel. The stamping process isn’t just about cutting out a circle; a specialized die also forms the tiny mounting feet on the reverse side of the blank. These feet are crucial, as they will later be used to secure the finished dial to the watch’s movement. At this stage, the disc is a simple, unassuming piece of metal, giving little hint of the radiant object it is destined to become.
Carving the Design: The Engraver’s Touch
Once the blank is prepared, it moves to the engraver’s bench. This step is essential for dials that use the champlevé technique, a word derived from the French for “raised field.” Using fine, sharp tools called burins, the artisan carefully carves away metal from the dial’s surface, creating shallow troughs or depressions. These depressions will eventually hold the enamel, while the remaining metal outlines form the borders of the design, such as the numerals or decorative patterns. This is a task that demands immense precision. The depth of each trough must be perfectly uniform to ensure the final enamel layer is smooth and even. It’s a subtractive art form where there is no room for error; one slip of the hand and the blank must be discarded.
The Alchemist’s Powder: Preparing the Enamel
The soul of the dial is the enamel itself. It’s essentially a special type of glass, a compound of silica, red lead, and potash, which is colored by adding various metallic oxides. For instance, cobalt yields a deep blue, iron creates shades of yellow and brown, and gold chloride produces a rich crimson red. The raw enamel arrives in rough, glassy chunks or plates that must be ground into an incredibly fine powder. This is traditionally done by hand in a mortar and pestle. The resulting powder is then meticulously washed with distilled water multiple times to remove any impurities. The final product is a fine, sand-like substance, ready to be brought to life by fire.
The Art of Application and the Science of Counter-Enamel
With the canvas carved and the colors prepared, the enameler begins the delicate process of application. The enamel powder is mixed with a liquid, usually water or oil, to create a paste-like consistency. Using a minuscule spatula or a fine-tipped brush, the artisan carefully fills the engraved cavities of the dial. Every recess must be filled evenly, with no air bubbles trapped within. It’s a slow, methodical process that requires a surgeon’s steady hand and intense focus.
It is absolutely critical that during this process, a layer of enamel is also applied to the back of the dial. This is known as counter-enamel. It isn’t for decoration but for structural integrity. As the enamel on the front melts, cools, and hardens in the kiln, it creates immense tension that would otherwise cause the thin metal disc to warp or crack. The counter-enamel provides an opposing force, balancing the tension and keeping the dial perfectly flat.
Simultaneously, a layer of enamel is applied to the reverse side of the dial. This is the crucial step of counter-enameling. It serves a vital structural purpose: during firing, the enamel and metal expand and contract at different rates. Without a balancing layer on the back, the tension would cause the thin dial to warp, buckle, or even crack. The counter-enamel creates an equal and opposite force, ensuring the dial remains stable and perfectly flat.
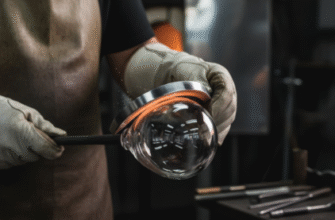
Trial by Fire: The Grand Feu
Now comes the most dramatic and perilous stage: the firing. The term grand feu translates to “great fire,” and it is an apt description. The enamel-coated dial is placed into a kiln heated to an extreme temperature, typically between 800 and 900 degrees Celsius (around 1500 Fahrenheit). The artisan, relying on experience and a keen eye rather than a digital timer, watches the magic happen. Inside the kiln, the enamel powder melts, fuses together, and bonds to the copper base, transforming into a smooth, glassy, and vibrant surface. The firing lasts for a very short time, often less than a minute.
Building Depth, Layer by Layer
A single firing is never enough. The process must be repeated multiple times to achieve the desired depth of color and flawless surface. After each firing, the dial is removed from the kiln and allowed to cool. The enamel may shrink slightly, so another layer of enamel powder is applied and the dial is fired again. For a simple white dial, this might involve four to five cycles of application and firing. For a deep, lustrous black dial, it could require eight or more layers. With each pass through the flames, the risk of failure increases. Bubbles, cracks, or dust contamination can occur at any stage, forcing the artisan to abandon the piece and start over from scratch.
The Final Polish and Print
After the final firing, the enamel surface, while lustrous, may not be perfectly flat. To achieve a mirror-like finish, the dial undergoes a process called lapping. It is carefully ground against a flat surface with a fine abrasive paste to level it completely. This momentarily dulls the surface, so it must undergo one last, very quick firing known as a glazing fire, or “glaçage,” which restores its brilliant, glossy sheen without melting the underlying layers. Finally, the dial is ready for its markings. The numerals, minute track, and brand logo are printed onto the enamel surface using a special enamel ink. The dial is then fired one last time at a much lower temperature to permanently fuse the printed markings onto the glassy surface, ensuring they too will never fade. The result of this long, arduous, and risky journey is a dial of incomparable beauty and permanence, a small piece of eternity for the wrist.